Ropsten faucets suck, how to mine your own sweet rETH
PUBLISHED
25 JANUARY 2022
Introduction
Since I began learning Solidity with OriginsNFT, we needed some Ropsten ETH or rETH in order to deploy smart contracts and experiment on the Ropsten network. Faucets typically give 0.1 to 1 rETH with some websites giving 10 rETH, but users are limited to receiving rETH every 24 hours to 1 week.
Mine your own
rETH is extremely easy to mine and I did it on a laptop with an i7 CPU with a GeForce 1660 Ti, nothing as crazy as what is required for the ETH Mainnet. This following guide pretty much outlines all the steps, however there were some changes I made that made it work. NOTE: this guide was completed on Ubuntu 18.04, with a CUDA compatible GPU, and requires ~200GB of disk space.
Installations
Firstly you’ll need to install some packages.
Ethereum
1
2
3
4
5

sudo add-apt-repository -y ppa:ethereum/ethereum
sudo apt-get update
sudo apt-get -y install ethereum
# verify, 1.10.15-stable at the time of writing
geth version
golang
1
2
3
4
5
6
7
8

# or head to https://go.dev/doc/install for the latest version
wget https://go.dev/dl/go1.17.6.linux-amd64.tar.gz
tar -xf go1.17.6.linux-amd64.tar.gz
rm -rf /usr/local/go && tar -C /usr/local -xzf go1.17.6.linux-amd64.tar.gz
# add directory to .bashrc, quotes here are extremely important
echo 'export PATH="$PATH:/usr/local/go/bin"' >> ~/.bashrc
# verify
go version
NVIDIA CUDA Toolkit
Head to the CUDA Toolkit downloads page and select which version you want. Version 11.5.1 was used in this guide. Alternatively, use the cuda role in my Ansible playbook.
CMake && ethminer
Follow the steps here or use the cmake role in my Ansible playbook, commenting out the other packages.
For ethminer, build the binary using the following:
1
2
3
4
5
6
7
8
9

sudo apt-get install -y git mesa-common-dev
sudo apt-get install -y build-essential
git clone https://github.com/ethereum-mining/ethminer
cd ethminer/
git submodule update --init --recursive
mkdir build && cd build/
cmake .. -DETHASHCUDA=ON -DETHASHCL=OFF -DETHSTRATUM=ON
cmake --build .
sudo make install
Fixing the CMake error
Inside of ~/.hunter/_Base/Download/Hunter/*/*/Unpacked/cmake/projects/Boost/hunter.cmake change https://dl.bintray.com/boostorg/release to https://boostorg.jfrog.io/artifactory/main/release
Doing this the lazy way,
1
2

# jank wildcard, tested locally
sed -i 's#https://dl.bintray.com/boostorg/release#https://boostorg.jfrog.io/artifactory/main/release#g' ~/.hunter/_Base/Download/Hunter/*/*/Unpacked/cmake/projects/Boost/hunter.cmake
Configuration
Run geth
Get the geth node up and running using the following:
1
2

geth --ropsten --http --http.api eth,net,web3,personal,miner,admin,txpool,debug --http.corsdomain '*' --http.addr 127.0.0.1 --http.port 8545 --syncmode "full"
GOROOT=go
Enter geth console
1
2
3

geth attach http://ip_address:port_number
# for example using the http.addr and http.port in Step 1
geth attach http://127.0.0.1:8545
Catching up with the network
When in the console you can view your peer information through the net command, and can see whether you have caught up with the network through eth.syncing _this should be false when you are fully caught up.
To speed up syncing, add some peers by copying the 1-liner here.
Now be patient and let it do it’s thing.
Setting the address
Inside the geth console, run the following:
1
2
3
4

# use your own address
miner.setEtherbase("0x92668e1E6Bbf1e7681A178FCcC144B99298bBA6a")
# verify
eth.coinbase
Start mining
1
2

# use 0 CPUs to mine
miner.start(0)
Run ethminer
1

ethminer -U -P http://127.0.0.1:8545
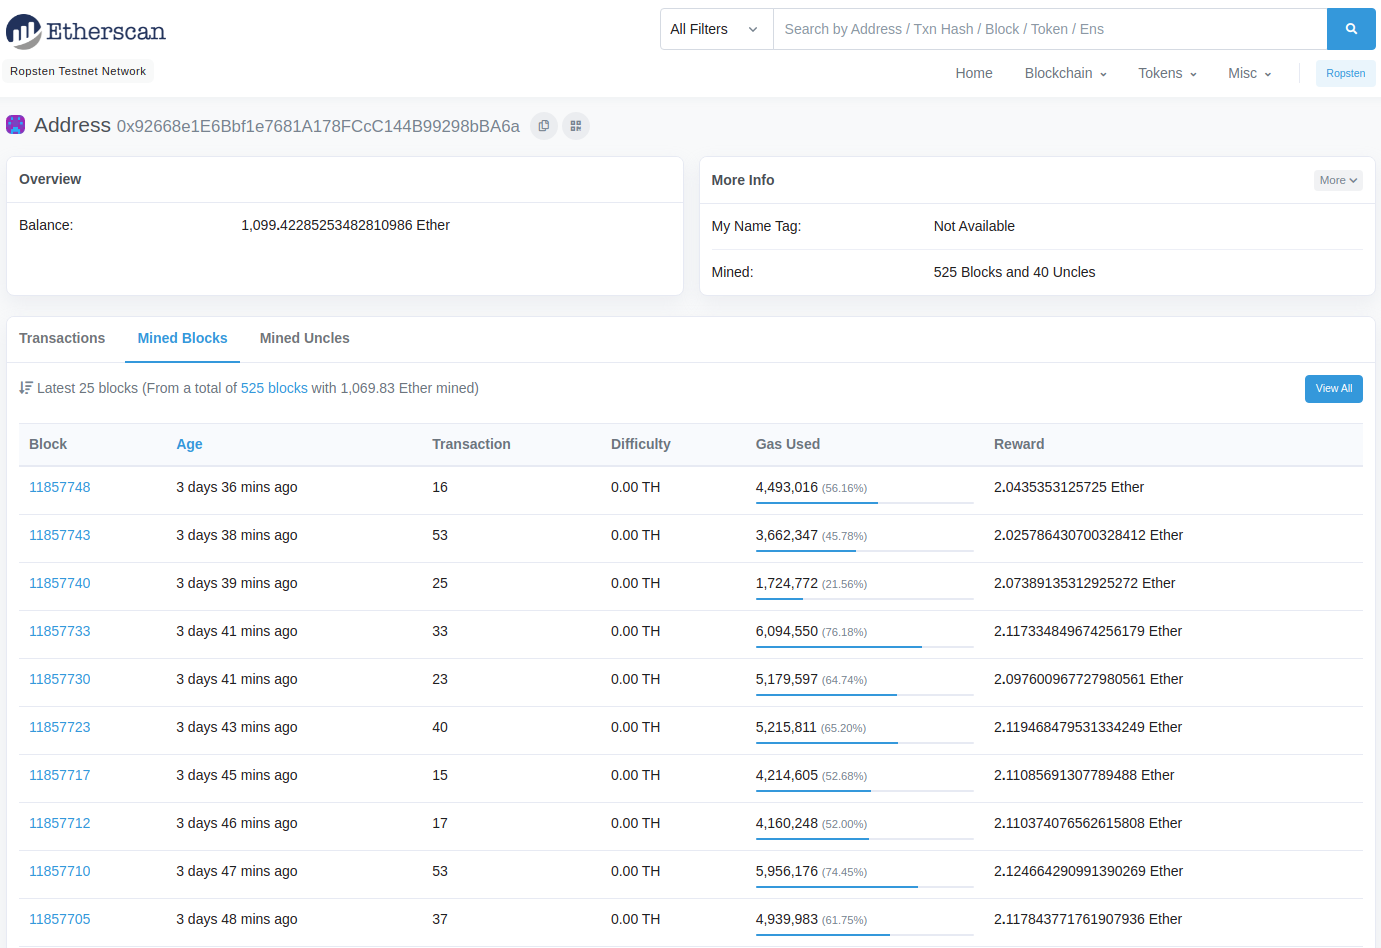
Aaaaaand you’re all set! Just wait for the rETH to come in and you should see something like this
